QtCreator and Netbeans are the two IDE's of choice by this development team because they both support cmake and are easy to configure.
Netbeans Installation
Ubuntu 16.04 has Netbeans 8.1 part of its repositories, which works just fine.
sudo apt-get install netbeans
the lcar-bot repository contains code written in C++, javascript and html, python and shell scripts, but the default installation of Netbeans doesn't have plugins for these languages so we need to install them.
Open the IDE and navigate to Tools > Plugins > Settings. Make sure all three of the available checkboxes, "Certified Plugins", "NetBeans Distribution", "Plugin Portal" are checked.
Next, go to the "Available Plugins" tab on the same window and search for "C/C++" and check the box. Do the same for "HTML5", "Python" "nb-noext-mime-resolver". The last one will provide syntax highlighting for shell scripts without file extensions. Click install at the bottom and follow all of the prompts.
ROS comes with a build tool called catkin_make that simplifies the building of ROS packages. we need access to the ROS command line environment in order to use it with Netbeans.
The ROS environment is setup by sourcing /opt/ros/<distro>/setup.bash, where <distro> is your distribution of choice (indigo, jade, kinetic), which if you
followed their installation instructions or the instructions in this guide
(located under General Setup), should have been added to your ~/.bashrc file. lets make sure:
gedit ~/.bashrc
At the bottom of your .bashrc file there should be the line
source /opt/ros/<distro>/setup.bash
If not, add it and save your .bashrc file before closing. It will make things easier. But don't forget to change <distro> to your ROS distribution.
Now opening a terminal will automatically setup the ROS environment for you.
In order to make Netbeans aware of the ROS environment we need to either launch Netbeans from a terminal (by typing netbeans into it)
or configure a netbeans.desktop file to always open Netbeans in a bash environment.
The easiest way to do that is to:
Open netbeans in a terminal.
Right click on the Netbeans icon in the launcher and click "Lock to Launcher". Now a shortcut for Netbeans should be visible on the launcher even when it isn't running. this creates a
netbeans.desktopfile under/usr/share/applications.We need to edit this file to always open netbeans in a bash shell:
sudo gedit /usr/share/applications/netbeans.desktopFind "Exec=netbeans" and replace it with "Exec=bash -i netbeans"
Save and close.
Now clicking on the Netbeans icon in the launcher will launch the IDE with the ROS environment sourced and ready to go.
Adding LCAR-Bot project to Netbeans
if you haven't already done so, follow the the General Setup guide to install the lcar-bot repository. we need it installed to ~/Documents to follow the next set of instructions. Note also that many of these instructions ask for file paths containing your Operating System user name. The author's username is serl, so all of the file path examples here will contain /home/serl/. make sure that your file path's match your username.
ROS uses its own custom build tool to compile its packages, catkin_make. We are going to take advantage of it but we need to import lcar-bot into Netbeans and while we're at it give the project a custom build configuration.
Netbeans supports cmake configured projects out of the box, which is why we are using it. We need to create a project in Netbeans with lcar-bot repository as its' source code.
The steps to do that are:
File > New Project. Choose C/C++ and "Project with Existing Sources". click Next >.
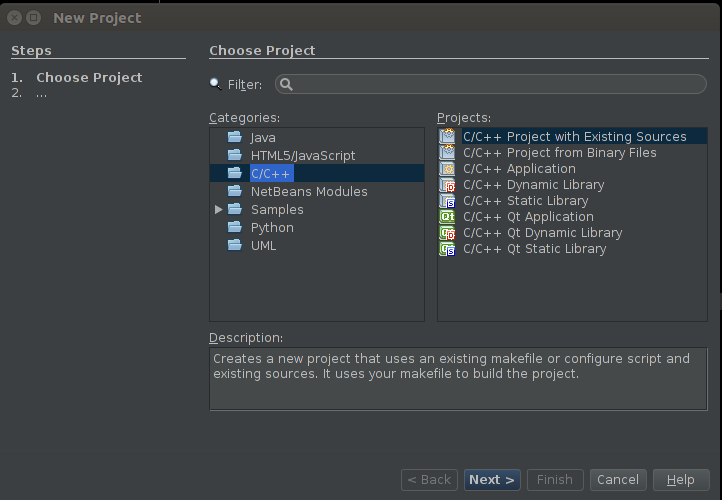
In the next window we need to specify the full file path to
lcar-bot/src/CMakeLists.txt. Also make sure "Configuration Mode" is set to "custom". click Next >.
Uncheck "Pre-Build Step Is Required". we will be using ROS' custom
catkin_maketool to build or packages.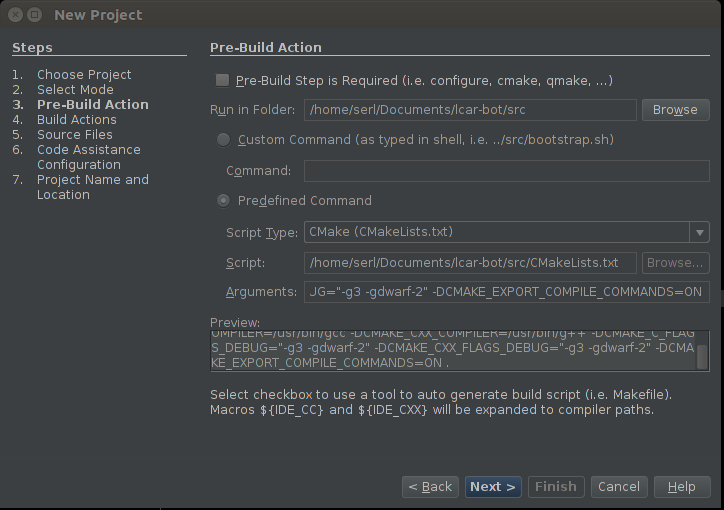
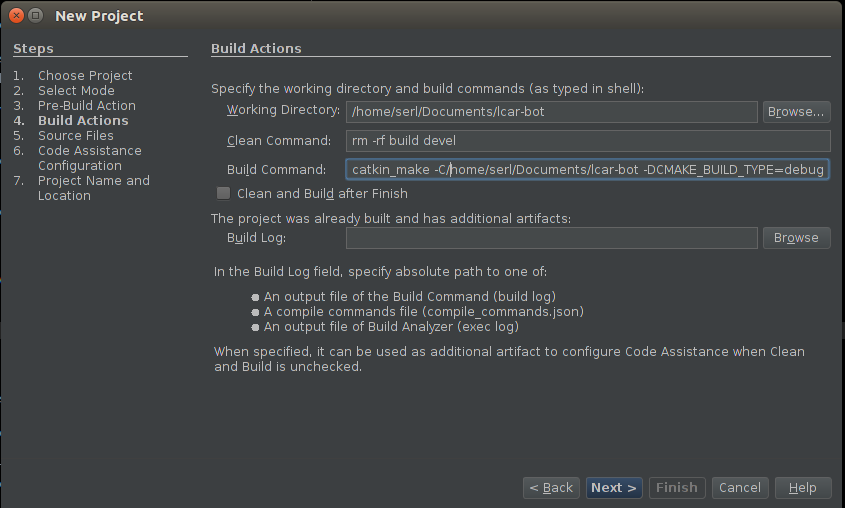
The "Build Actions" window is where we will specify the custom
catkin_makebuild command. the the fields we are interested in are "Working Direcory", "Clean Command", and "Build Command".Working Directory: should contain the file path entered earlier, including
src. removesrcfrom the end of the path. these examples contains file paths relative to this installation. adjust yours accordingly.Clean Command: should contain
rm -rf build develBuild Command: should contain
catkin_make -C/home/serl/Documents/lcar-bot -DCMAKE_BUILD_TYPE=debugUncheck "Clean and Build after Finish". we will build it manually at the end.
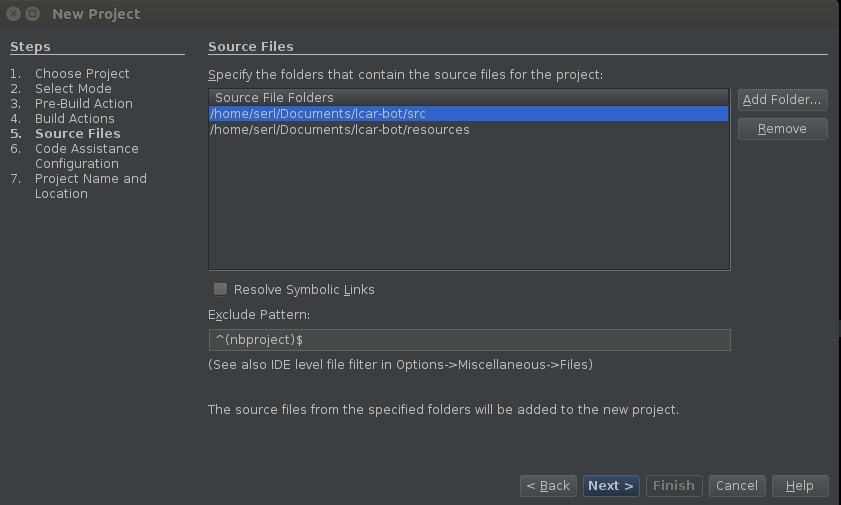
The next window, Source Files, should contain: "/home/serl/Documents/lcar-bot/src" and "/home/serl/Documents/lcar-bot/resources". You need to that the second one manually by clicking "Add Folder". after it is added click Next >
Code assistance Configuration window should have "Automatic Configuration" selected.
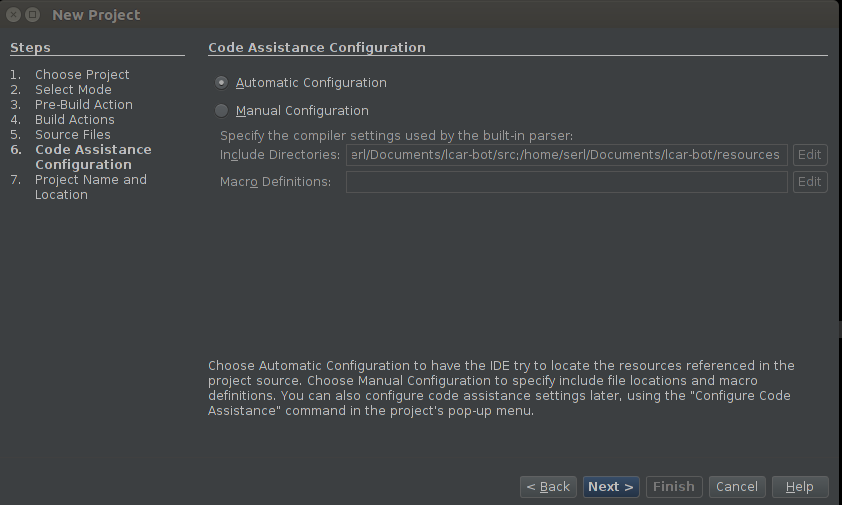
the Final Window, Project Name and Location, is where we name the project and choose where we store the Netbeans Project configuration files. We don't want to clutter the repository with them, so we will keep them in a NetbeansProjects directory in or home directory. That is, the "Project Location" directory should be:
/home/serl/NetbeansProjects
It's time to build the project. make sure you have the new project selected in the projects navigator window and then click the hammer icon at the top of the netbeans window to build it. the hammer-broom icon will do a clean and build. you should see output similar to the following:
8_build_output PIC here.
QtCreator
the process for QtCreator is similar to Netbeans. Assuming you have QtCreator installed, create a qtcreator.desktop file the same way you did for netbeans, and change the "Exec=qtcreator" line to "Exec=bash -i qtcreator"