Quadrotor Summary
This page covers the setup process for Quadrotor UAVs. Quadrotors have 4 propellers and two onboard computers, the Nvidia Jetson TK1 and the Pixhawk Flight Controller. The Nvidia Jetson TK1 is mostly responsible for managing motion tracking data of the vehicle and the Pixhawk is responsible for using sensors and controlling the vehicle. The quadcopters use OptiTrack motion tracking cameras for positioning during indoor missions and GPS for positioning during outdoor missions.
Companion Computer Setup
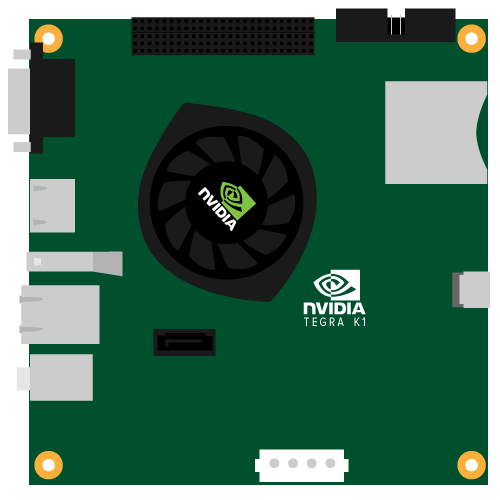
Companion Computer Nvidia Jetson TK1 Specifications:
- CPU: Quad-Core Arm Cortex A15
- 2 GB x16 Memory with 64-bit Width
- 16 GB 4.51 eMMC Memory
- 1 Full-Size HDMI Port
- 1 USB 3.0 Port, A
See more at \_[_Nvidia's Website](http:\/\/www.nvidia.com\/object\/jetson-tk1-embedded-dev-kit.html)
Connecting the Jetson TK1 to the Pixhawk
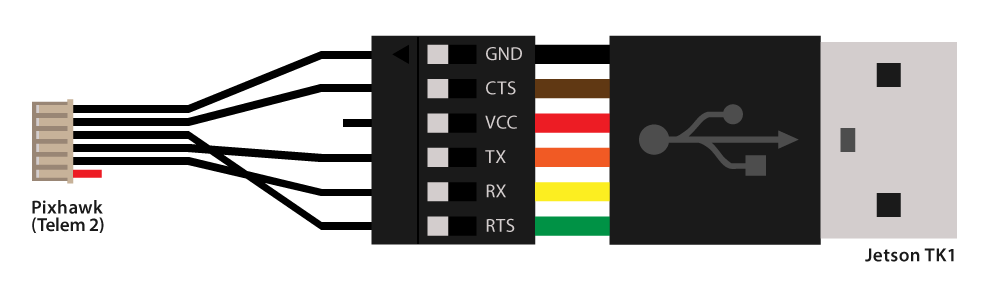
- The first step is to create a serial connection between the Pixhawk and the Jetson TK1. For this, we can use an FTDI cable with some modification to connect the Telem 2 port on the Pixhawk to the USB port on the Jetson. Figure 1 details the connection between these two ports.
Note: Ensure that the SYSID_THISMAV parameter on the FCU firmware matches the tgt_system in the launch file for running mavros. If the two do not agree, some topic will not be published and\/or mavros will not work properly.
Tuning Parameters
Testing with a live vehicle introduces a lot of sensor noise and therefore more drift. This can be alleviated to a certain extent by tuning the vehicle properly. On the PX4 flight stack, the following parameters should be tuned carefully:
- LNDMC_THR_MAX: Multicopter max throttle
- MPC_Z_VEL_MAX: Maximum vertical velocity in AUTO mode and endpoint for stabilized modes (ALTCTRL, POSCTRL).
- INAV_W_Z_BARO: Weight (cutoff frequency) for barometer altitude measurements.
- ATT_EXT_HDG_M: Set to 2
It is also a good idea to properly trim the RC values so that the vehicle can hover without too much drift.
- RC Channel 3: Throttle
- RC Channel 4: Yaw [Increase RC4_TRIM to Yaw left]
- RC Channel 1: Roll [Increase RC1_TRIM to Roll left]
- RC Channel 2: Pitch [Increase RC2_TRIM to pitch forward]
For Motive Tracker setup, ensure that the yaw is pointing in the right direction!! It is very important. Otherwise, you'll notice a lot of drifting behavior.
For details on working with GPS Coordinates, see here.
Live Drone Testing from the GCS
The following steps are required in order to initialize the drone, gcs, motion capture software, and mavros.
- Make sure that the Jestson, motion capture, and the GCS are all on the same wireless network. In the case of SERL developers this will probably be "SERL GCS 5Ghz."
- If a computer is not connected to the correct internet, it may be necessary to restart before proceeding.
- Setup the Motion capture server
- Make sure all the cameras are plugged in via usb to a hub. If there is mor ethan one hub, make sure they are sinked with each other by connecting a wire to the "Input" of one and the "Output" of the other. Then make sure the computer is connected to the cameras with an "A to B USB Cable."
- Open the motive software and go to View -> Camera Calibration. Proceed to then wave the wand to calibrate the cameras and set the ground plane.
- Once calibration is completed, go to View -> Datastreaming
- Check "broadcast frame data"
- Double click on the local interface to double check that it has the correct ip address.
- Define the rigid body by moving the vehicle into the cameras view and highlighing the illuminated points. Right click, create a rigid body, and go to properties in order to rename the vehicle "quad2"
Setup the GCS and Jetson
- type "ntpq -c lpeer" into the terminal and check to make sure there is a * next to the IP address. This means the GCS is synced properly with the system.
- run ./mocap_namespace
- in a separate terminal, run ./throttle_namespace
- Now the mocap data will be streaming to the GCS at a manageable 25Hz.
- Open a third terminal and SSH into the Jetson so we can call the bootup sequence. ./ssh_jetson
check the date using the command "date" and make sure it is the same. If not, restart.
at this point, make sure the controller for the drone is turned on a ready to assume manual control of the drone if a complication arises during the flight. This way nobody is injured and the drone is not destroyed in a crash.
run ./launch_mavros___namespace in order to begin the flight sequence.
run the following commands in a new terminal to display the position and orientation of the drone from the mocap system and the drones internal sensors:
rostopic echo V2000/mavros/mocap/pose
rostopic echo V2000/mavros/local_position/pose
Now that the system is properly displaying data and is sharing data, the flight node can be run:
- rosrun vehicle uav_control_test_node
After a few seconds, the drone should begin its preplanned flight procedures.